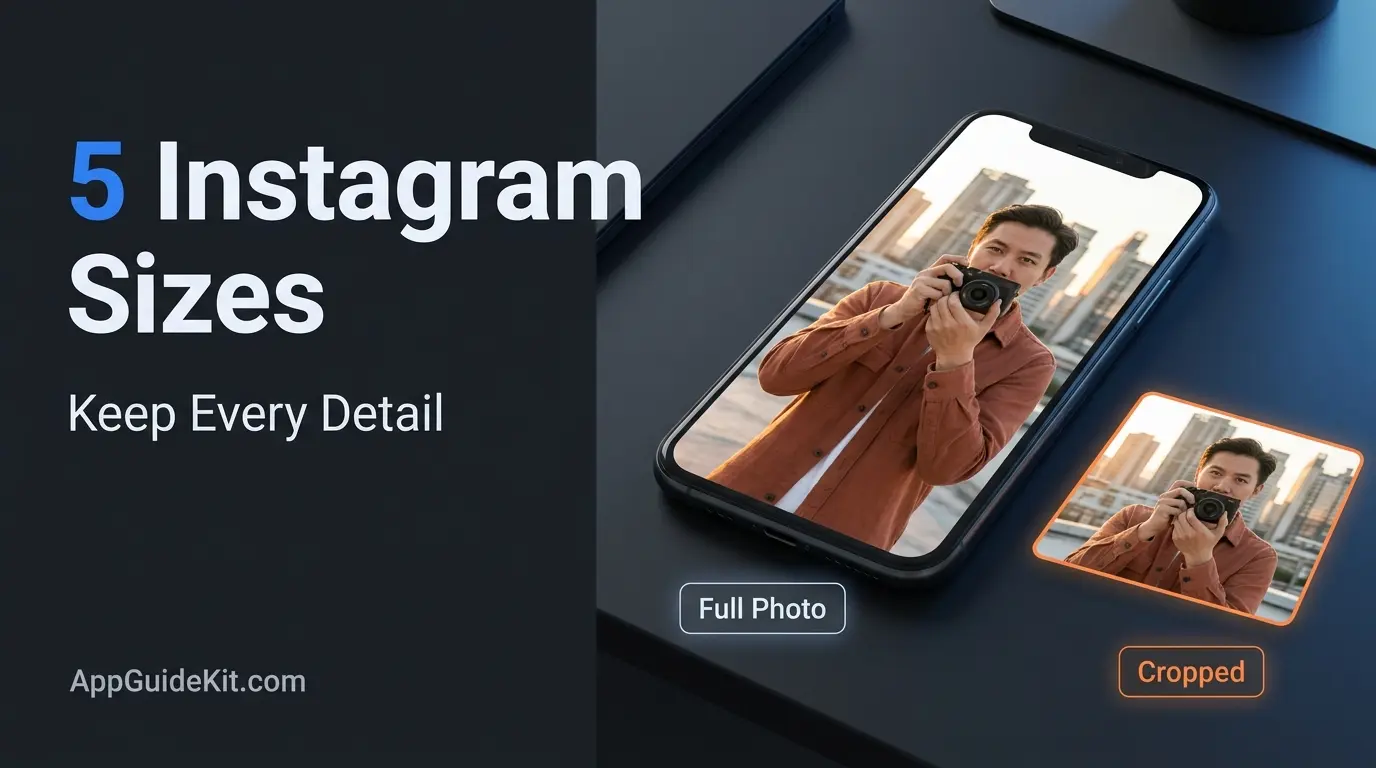
Your photo looks perfect in your gallery, but Instagram cuts off a face or the text near an edge. The right aspect ratio for Instagram helps you choose a frame that fits your content and spot why a preview looks different.
This guide covers sizes for feed posts, carousels, Reels, and Stories. You’ll learn how to preserve a whole photo, add borders in Canva, adjust video in CapCut, and check your profile preview before posting.
Before you start: Have your original file, an updated Instagram app, and an editor ready. Difficulty: beginner. Allow roughly 5–10 minutes for a basic resize, excluding uploads.
Quick Reference: Aspect Ratio for Instagram
For portrait feed photos, start with 3:4 or 4:5. For full-screen Reels and Stories, use a 9:16 canvas. Instagram’s photo guidance supports photo ratios from 1.91:1 to 3:4, so 3:4 isn’t limited to the profile grid. facebook.com
These Instagram post sizes are practical export choices for 2026. Dimensions below mean width × height.
| Format | Ratio | Suggested canvas |
|---|---|---|
| Square feed photo | 1:1 | 1080 × 1080 px |
| Portrait feed photo | 4:5 | 1080 × 1350 px |
| Taller portrait photo | 3:4 | 1080 × 1440 px |
| Landscape feed photo | About 1.91:1 | 1080 × 566 px |
| Reel or Story | 9:16 | 1080 × 1920 px |
| Carousel slides | Supported photo ratio | Matching canvases for a consistent layout |
| Profile photo artwork | 1:1 source | Square design with the subject centered |
These are working canvases, not universal minimum requirements. Profile photos display inside a circle; keep faces and logos clear of the corners.
Understand Aspect Ratios Before You Resize
An aspect ratio describes width compared with height. Pixel dimensions describe how many pixels form the image. Both 1080 × 1350 px and 2160 × 2700 px have a 4:5 ratio.
The aspect ratio for Instagram controls the frame’s shape. Increasing resolution won’t change that shape or restore something you cropped out.
Choose the edit that matches your goal:
- Resize proportionally: change dimensions while keeping the same shape.
- Crop: remove part of the image.
- Add padding: place borders around the complete image.
- Stretch: change the proportions and distort the subject.
- AI expansion: generate new content beyond the original edges.
Choose an Aspect Ratio for Instagram Feed Posts
The best aspect ratio for Instagram preserves what matters in your picture. Choose it before adding text, logos, or decorative borders. A taller format isn’t automatically better for every subject.
Portrait Photos: When to Use 3:4 or 4:5
Use 3:4 when it matches your original portrait photo. Choose 4:5 when your design or publishing workflow suits that shape. At the same width, 3:4 gives you more height.
For example, converting 1080 × 1440 px to 1080 × 1350 px by cropping removes 90 px of height. With a centered crop, that’s 45 px from each end.
Square and Landscape: Preserve Wider Subjects
Square designs work well for centered products and simple graphics. Landscape frames suit scenery or groups that need space across the image.
Don’t change a wide photo into a portrait by stretching it. Keep the wider composition or place it inside a taller canvas with padding.
Find Out Where Instagram Is Cropping Your Image
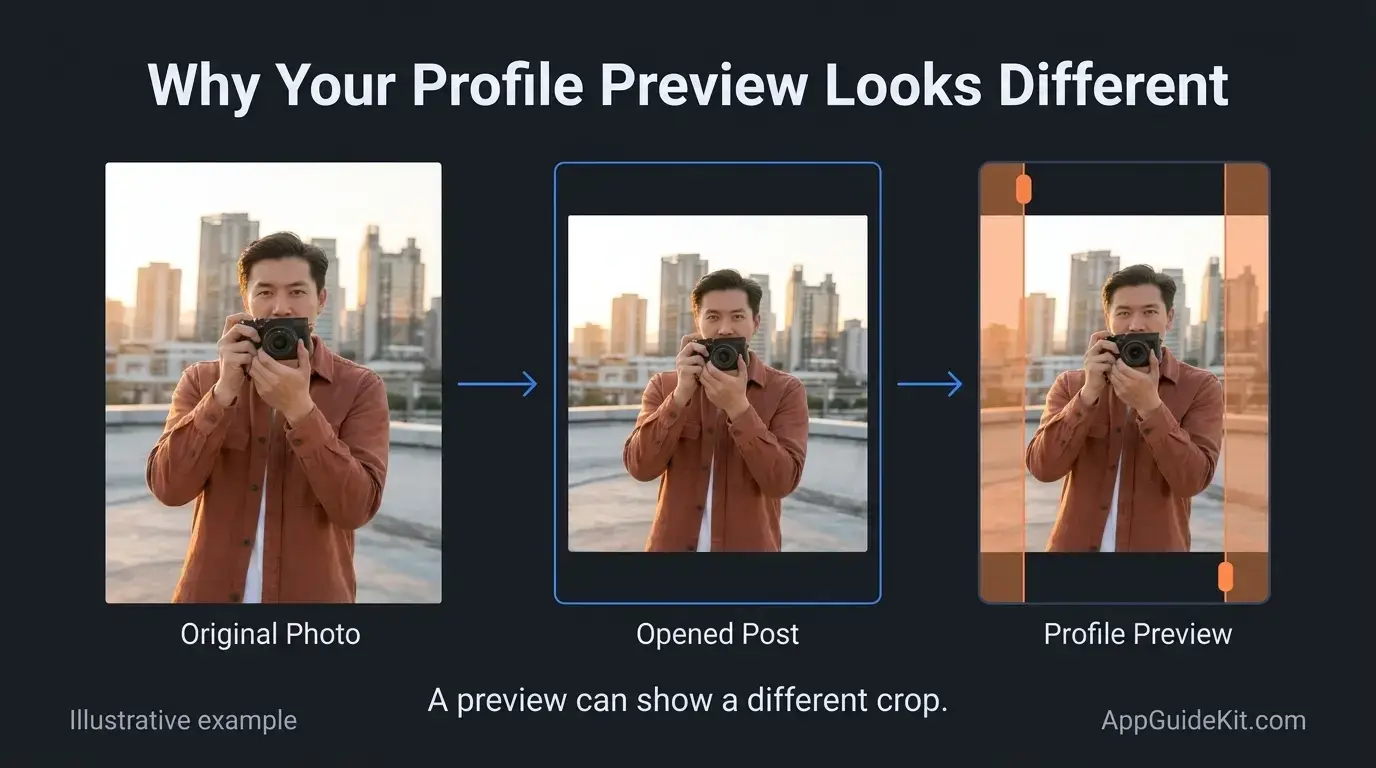
Where does the detail disappear: the upload preview, the opened post, or only the profile grid? Check each view. They can need different fixes.
- Compare the source and export. If the detail is already missing, return to your editing project.
- Inspect the upload preview. Check the fit or crop setting before continuing.
- Open the published post. A complete image here points to a thumbnail issue.
- Inspect the profile preview. If your app offers an adjustment control, review its positioning options.
A 4:5 image and a 3:4 thumbnail have different shapes. A thumbnail can therefore trim an otherwise valid upload. Changing its preview won’t restore pixels removed during editing.
Fit a Whole Photo Without Cropping or Stretching
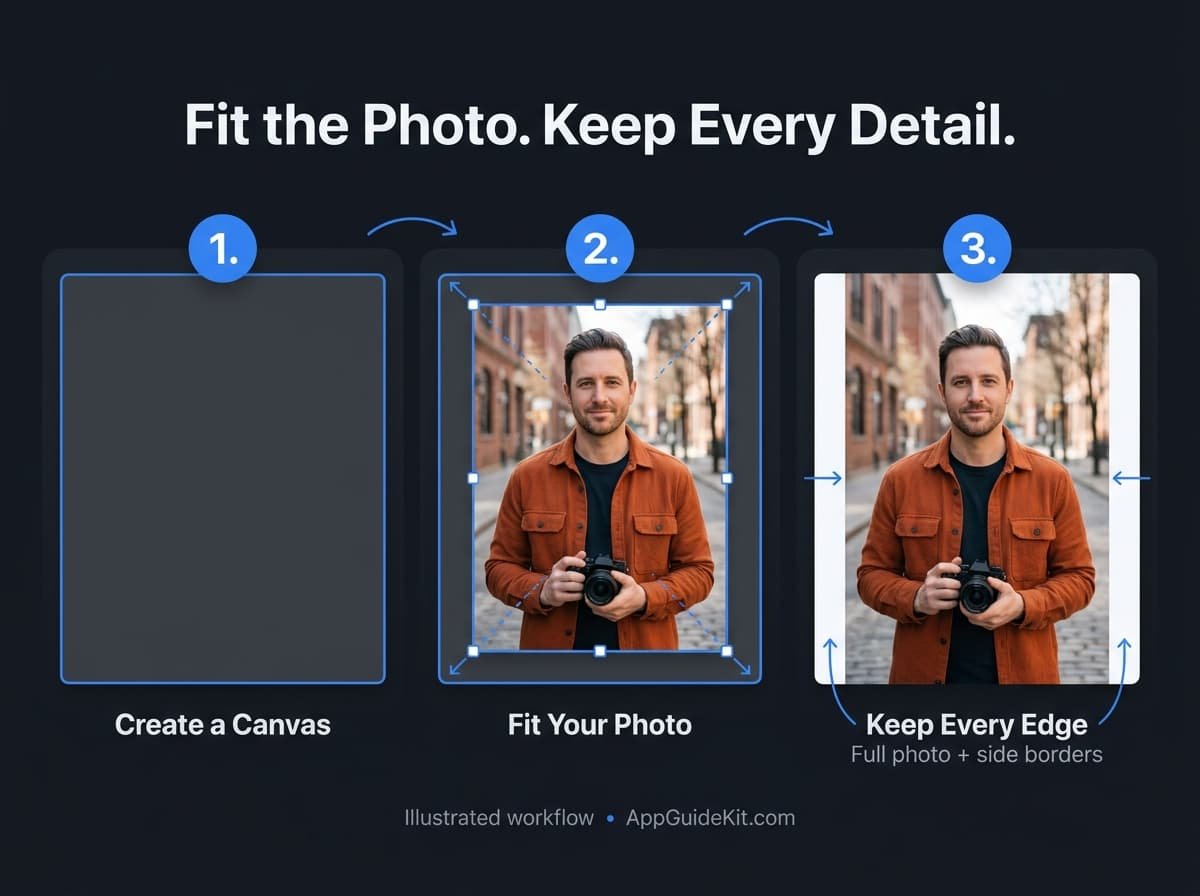
To preserve every edge, fit your photo inside a supported canvas. If their shapes differ, some space must remain unless you crop, distort, or extend the image.
Try Instagram’s Fit Control First
- Start a photo post and select the original.
- Look for the expand or fit control in the preview.
- Check the top, bottom, and both sides.
- If the full picture won’t fit, prepare a padded version.
Control names can vary by app version and posting method.
Add Borders in Canva: A Practical Example
Use Canva’s custom dimensions to create the frame yourself.
- Create a Custom size design using pixels.
- Set the canvas to 1080 × 1440 px.
- Upload your photo and add it as an image element.
- Scale it proportionally until the whole image fits.
- Center it and choose a white or matching background.
- Download the design and inspect its edges.
Worked example: A 4000 × 6000 px portrait has a 2:3 ratio. Fitted inside this 3:4 canvas, it becomes 960 × 1440 px, leaving 60 px of padding on each side. Every part of the original remains visible.
Pro tip: Avoid setting the photo as a background that fills the page if Canva crops it. Keep it as a separate image element.
Use AI Expansion When New Background Is Acceptable
Canva’s Magic Expand instructions describe this desktop workflow:
- Select the photo, then choose Edit.
- Open Tools → See All → Magic Expand.
- Choose an area or drag the handles outward.
- Select Expand, then inspect the generated result.
Availability and usage limits depend on your account. Check faces, hands, product edges, and text carefully. AI invents the added scene; it doesn’t recover a real view outside the photograph. Use plain borders when accuracy matters. Canva Help Center
Prepare Mixed-Size Photos for an Instagram Carousel
A consistent aspect ratio for Instagram carousel slides makes layouts easier to control. This matters when you combine a tall portrait, a wide scene, and a screenshot.
For example, create one portrait template, duplicate it for each slide, and fit each original inside it. Use the same background color and keep headings in the same position.
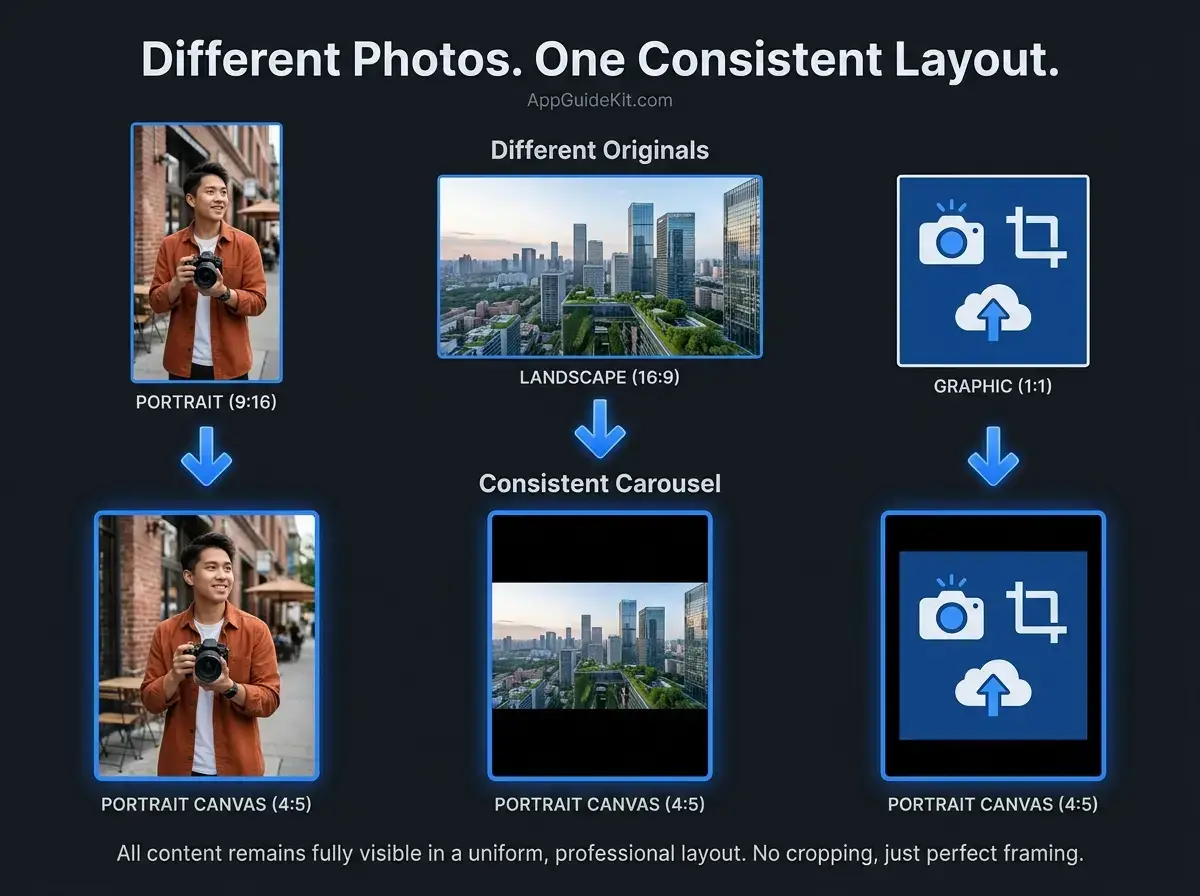
Preview every slide, not just the cover. Check any mixed-format controls available in your app instead of assuming every account or publishing tool behaves identically.
If you’re batching uploads, check your scheduler’s current media requirements. Our Instagram scheduling guide explains the wider publishing workflow.
Plan Reels, Stories, Covers, and Text Placement
Use 1080 × 1920 px as a practical vertical working canvas. The video, cover, and profile thumbnail can show different portions of that design.
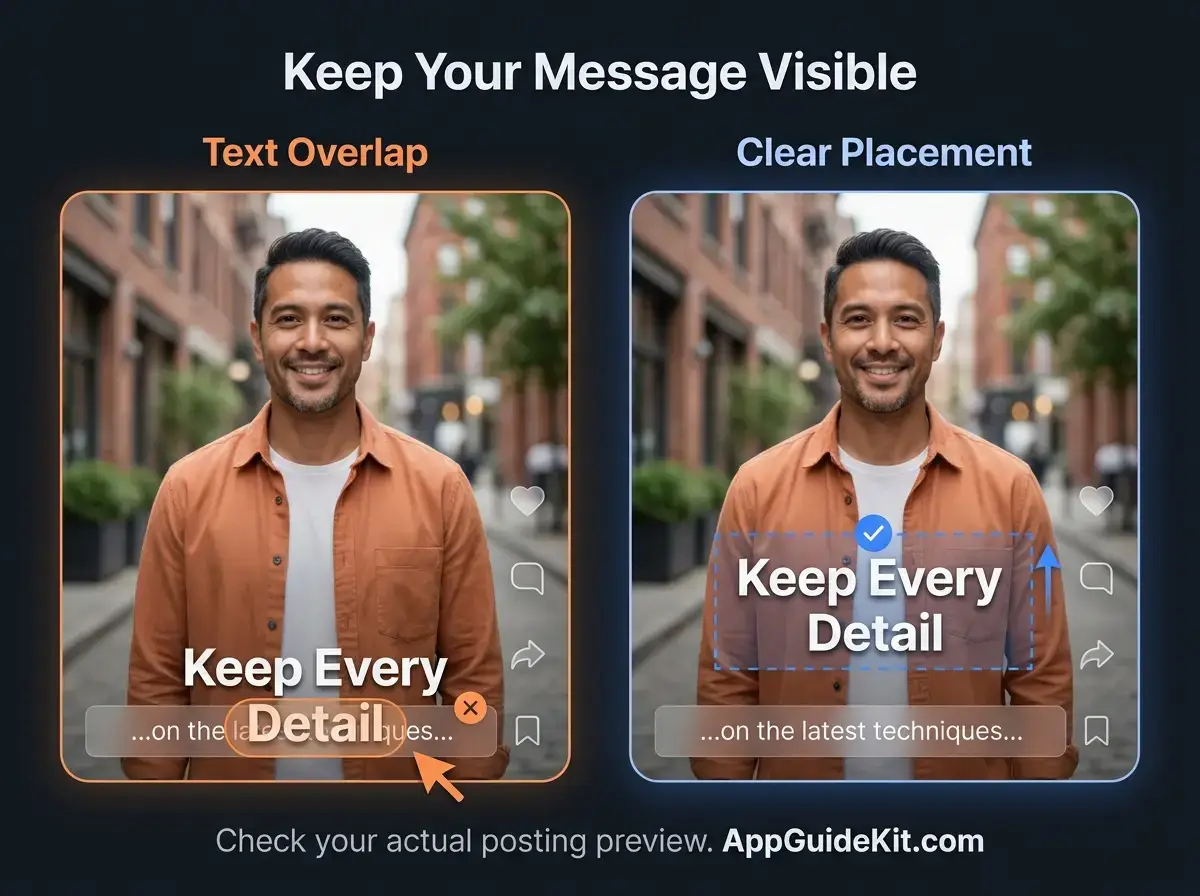
Keep Important Text Clear of the Interface
Leave room around usernames, captions, and action buttons. Review the actual posting preview before placing a headline near an edge.
A crop overlay and a text safe zone serve different purposes. The first shows which image area may remain visible; the second helps keep text away from controls. One generic pixel margin can’t account for every view.
Design a Cover That Survives a Smaller Preview
Keep the title short and place the main subject near the center. Check the cover at thumbnail size: text that looks readable while editing may become tiny on your profile.
Create a separate cover layout if the opening video frame makes a poor thumbnail. Preview the cover independently from the video.
Export a Vertical Video in CapCut Without Distortion
A horizontal clip can’t fill a tall screen while preserving both its proportions and every edge. Choose a subject-focused crop or keep the full clip with a background.
- Import your footage into a CapCut project.
- Set the Canvas, Ratio, or equivalent control to 9:16.
- Scale the clip to fit; add a solid or blurred background where needed.
- Check every clip and reposition captions.
- Export at 1080 × 1920 px. Select MP4/H.264 where available.
- Open the saved file and review it before uploading.
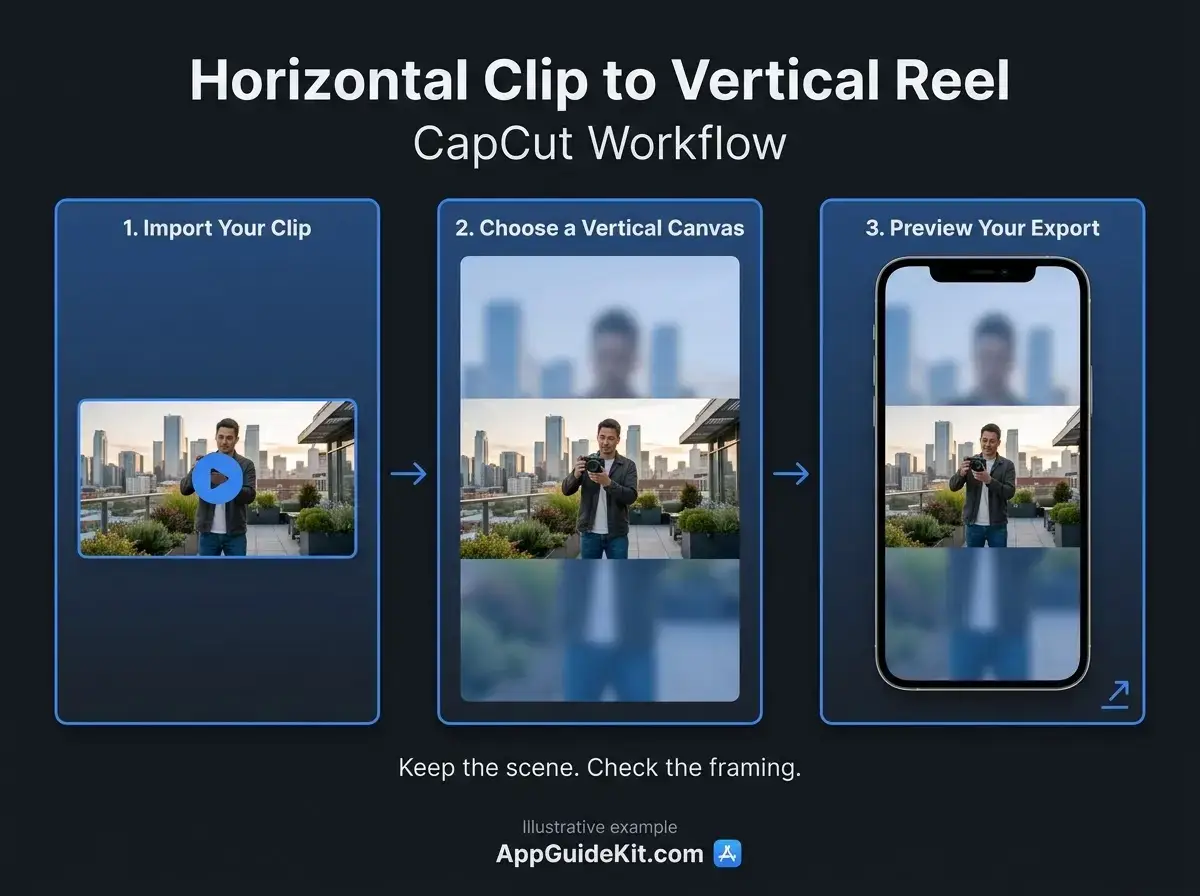
CapCut’s resizer guide explains canvas and background adjustments; labels differ across versions. Instagram’s Reel requirements state a minimum 30 FPS and 720-pixel resolution. A 1080 × 1920 export provides a practical canvas above that resolution minimum. CapCut
Troubleshoot Blurry Images and Failed Uploads
Locate the first stage where the result changes: original file, export, upload preview, or published post. Changing dimensions won’t solve every problem.
| Symptom | What to check | Next action |
|---|---|---|
| Photo looks stretched | Width and height changed separately | Lock proportions and re-export |
| Export already looks soft | Small source or repeated compression | Return to the original file |
| Only a carousel slide loses content | That slide’s framing | Fit it inside your chosen canvas |
| Text disappears behind buttons | Placement preview | Move the text inward |
| Scheduler rejects the file | That tool’s media rules | Export to its supported specifications |
Save your editable project so future versions come from the source. Avoid repeatedly downloading and re-uploading a compressed copy.
Correct sizing alone doesn’t establish why reach has fallen. If your framing looks right, use our Instagram reach troubleshooting guide.
Frequently Asked Questions About Instagram Sizes
What aspect ratio is 1080 × 1350?
It’s 4:5 because dividing both dimensions by 270 gives 4 and 5. Width comes first: 1350 × 1080 is a landscape 5:4 image instead. Does your design look sideways or too wide? Check the saved file’s pixel dimensions. A template name alone doesn’t tell you which size your editing app exported.
Which aspect ratio for Instagram Reels should I use?
Use 9:16 for a vertical Reel intended to fill the viewing area. Other ratios may be accepted, but they can leave space around the footage. Is your original horizontal? Decide whether keeping the whole scene matters more than filling the screen. Then choose padding or crop carefully around the main subject.
How do I fit a whole photo without cropping?
Fit the original in the upload preview or place it on a larger canvas with padding. If the photo and destination have different shapes, you can’t preserve every edge, fill the entire frame, and avoid distortion simultaneously. Borders are useful for group photos, screenshots, or product images where every detail matters.
Why is Instagram cropping my 4:5 photos?
The profile thumbnail may use a different shape from the opened post. Check both before editing the original again. If the uploaded post itself loses content, inspect the composer and your exported file. A supported ratio doesn’t prevent a manual zoom, an editing crop, or a different carousel layout from cutting something off.
Is a 3:4 image the same as a 4:3 image?
No. A 3:4 image is taller than it is wide; a 4:3 image is wider than it is tall. For example, 1080 × 1440 is portrait, while 1440 × 1080 is landscape. Rotating an image turns it. Swapping its width and height in export settings can crop or stretch the picture instead.
Can I reuse the same design for posts and ads?
Sometimes, but check the paid placement separately. An organic upload that looks correct doesn’t prove that every ad will display it the same way. Use Meta’s placement guidance and inspect the ad preview. Adjust text and framing for the placement you want to use before you publish or boost the content.
Will a larger export fix a blurry photo?
Not by itself. More pixels don’t recover detail missing from the source. Start with the original photograph rather than a screenshot or compressed download. AI upscaling may generate plausible detail, which isn’t always accurate. Compare text and product features closely if you use it, and keep the unedited source available.
What aspect ratio for Instagram fits a panorama?
A wide frame may still crop a panorama that’s wider than the supported photo range. Keep the full scene by padding it, or divide it into an ordered carousel. When splitting an image, use equal slide dimensions, align the joins, and avoid cutting through faces, labels, or words across slide boundaries.
Your Final Aspect Ratio for Instagram Checklist
Choose the aspect ratio for Instagram that fits your subject and destination. Start with a supported canvas, preserve the original proportions, and use padding when the whole scene needs to stay visible.
Before posting, inspect the saved file, each carousel slide, and any cover or profile preview. Check small text at phone size and leave room for the interface. These checks catch problems that a dimensions table alone can’t reveal.
Try the workflow with one image first. Once you’re happy with its framing, save the editable design as a reusable template for future posts. Keep separate versions when your feed and full-screen content need different layouts.
After fixing presentation, explore our Instagram SEO guide to work on captions, context, and discoverability.